
Open for Business
Your customers can easily access your free online store to make secure purchases and there isn't a great deal involved in getting it up and running with Merch Window.
Complete these quick steps and you'll be selling online in no time.
1.
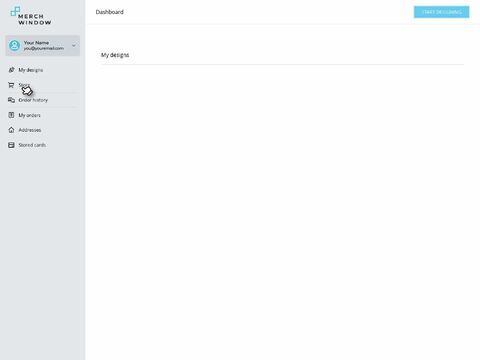
After logging in, you'll arrive at your Merchant Dashboard. Select 'Store' from the main menu on the left.
2.
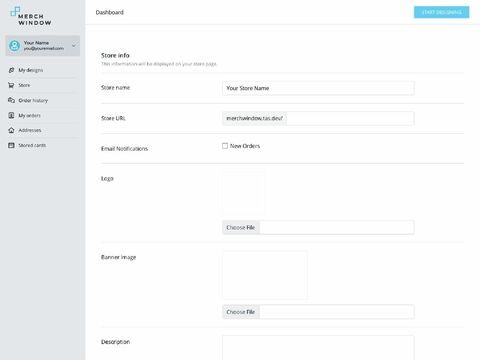
Find the 'Store name' field and give your shop a title.
3.
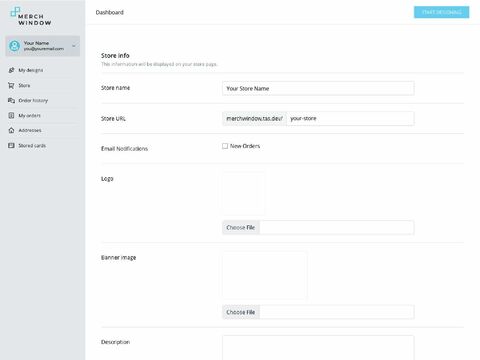
The Store URL field is used to give your store a unique link for you to share with your customers. You can enter something you'd prefer or leave it blank for a URL to be generated from your store name.
4.
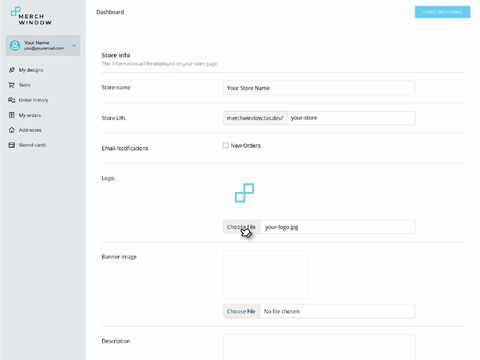
Next to where it says ‘Logo’, select ‘Choose File’ to upload the logo you wish to have featured on your custom store. When your edits are updated, the logo will load.
For best results, we recommend a .jpg file at around 512px square.
5.
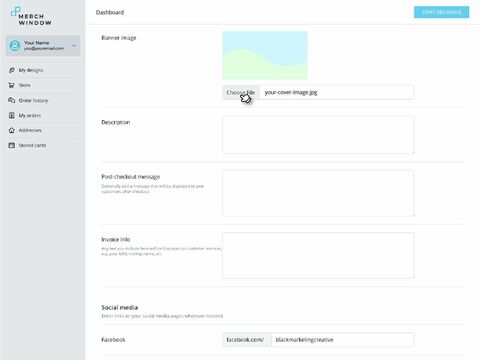
Underneath the title 'Banner image', select 'Choose File' to upload the banner image you wish to have featured on your custom store.
Your .jpg image should be between 1080px and 1920px wide.
6.
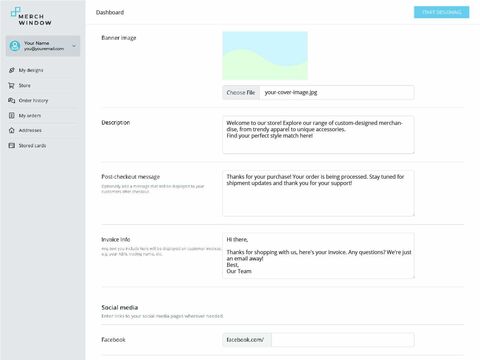
The 'Description' field is where you let customers know what they've found. Tell them a little about you, your store, anything you feel will lead to them wanting to learn more.
The 'Post-Checkout Message' is what customers will see when they've made a purchase from your store. This is a great place to enter a general thanks for their support!
Last for this section is the 'Invoice Info' and this shows on the invoice a purchasing customer will receive. If you'd like to enter a trading name, ABN or other info, this is the place to do it.
7.
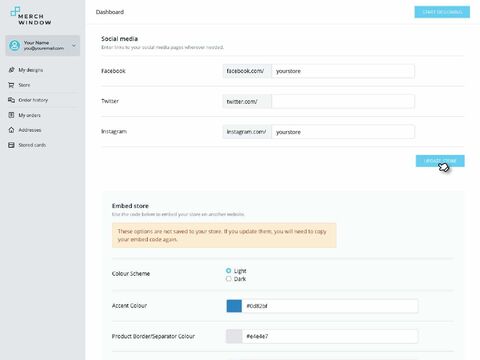
You can add links to your current social media URLs for your followers to find you in other places within the Social media section. If you don't have a particular channel just leave that field blank.
Time to save!
We'd hate for your entire store setup to go to waste, so if you're happy with everything, select 'Update Store'.
Your store will now be viewable in the unique URL you have created (i.e., www.merchwindow.com/your-store) but you'll need to skip to step 9 to connect your store and actually start receiving profits from your sales.
Please note that any sales made prior to connecting with our secure payment gateway will result in lost profits.
8.
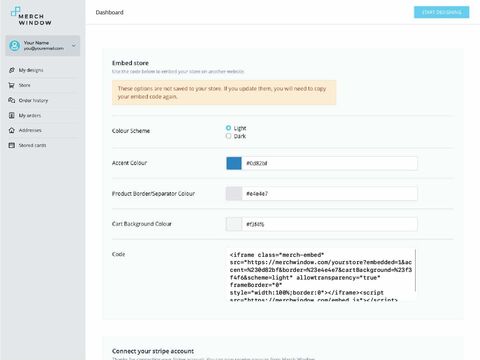
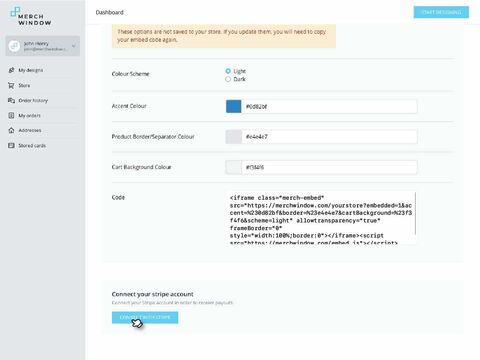
This section is where you can find your store embed code to allow your free Merch Window storefront to appear in your own website. Simply edit the details and copy the code, then you're ready to paste it into an appropriate location on your existing website's platform. For security reasons these aren't saved, so any changes will need to be made again if you refresh this page.
9.
Probably the most important step in creating an online store, a payment gateway allows for secure payments for purchases by your customers and makes it possible for us to send your payments to you.
Merch Window uses one of the largest and most reputable payment gateways online to handle our payments, and we're proud to be an official Stripe Partner.
In the section titled 'Connect your stripe account' at the bottom of the page, hit 'Connect with Stripe' to start the process.

Need a hand?
We can understand that sometimes processes like this end up in the 'too hard' basket and that's ok.
We're constantly working to make using Merch Window a simple and easy process for you, but we have actual people to assist when we haven't quite met that mark.
If you need help with setting up your store or anything else, reach out and we'll be happy to get you going again!